SAP change intelligence: Everything you need to know
In this guide, we’ll break down the key points you need to know...
Using Tricentis NeoLoad for mobile testing is available for native, hybrid, web, and secure applications. Each of these application types requires utilization of HTTP content for data transfer for NeoLoad to consume into a user path.
Mobile testing is a powerful addition to the many features within NeoLoad. Not only can you test your applications from a use case standpoint, but you can also emulate users who are accessing your test as if they were using smartphones.
When emulating, both iPhone and Android models are covered with a variety of versions from which to choose. How to handle this during a test is explained later in this article.
To configure a recording via mobile device requires setting up proxy mode, although tunnel mode recording can also be used if the proxy method is unavailable.
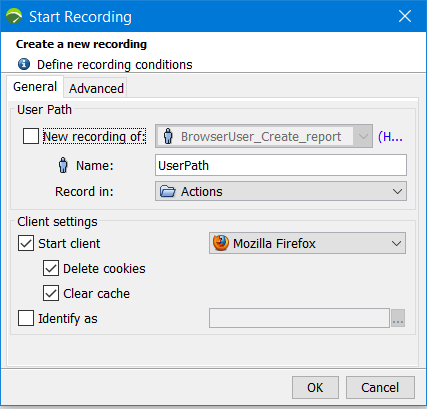
Once at the “Start Recording” dialogue, click on the Advanced tab:
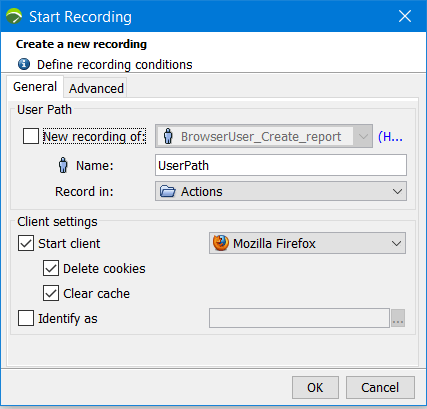
The modes group box is the place we mentioned earlier to choose the recording mode type.
To record a native application in the proxy mode, as most native apps are designed with an API that utilizes a proxy, NeoLoad can act as that proxy to catch the activity. The communication between the device and the server is recorded through the proxy-based recorder. To set it up correctly, both NeoLoad and the mobile device must be on the same network (sometimes this requires the disabling of other networks on the mobile device). At this point, you have the mobile device connected to the same network as NeoLoad in WiFi. On the mobile device, it is necessary to modify the proxy used by the app or browser manually. The hostname must be the name or the IP of the NeoLoad machine. The port NeoLoad uses to record is 8090 by default.
Also, the proxy mode option must be selected, and it is recommended to uncheck the “Start Client” option, as the mobile device itself generates the traffic. As soon as you start recording, the mobile application can be used, and NeoLoad will catch the HTTP traffic to create the test scenario’s user path.
When an application does not support the definition of a proxy, it is necessary to use tunnel mode. This mode makes it possible to record any mobile application, be it web, native, standard, or customized, for any platform, any version. However, if your application supports proxy, it’s strongly recommended to use this method as it’s typically more straightforward than the tunnel mode counterpart.
To record in tunnel mode, switch the option from the proxy to tunnel mode via the advanced recording dialogue by de-selecting “Start Client.” The NeoLoad tunnel function makes it possible to launch the NeoLoad Recorder without using the NeoLoad Proxy. In this way, the tunnel mode simulates the web server for the mobile device, and it processes the request and responses as the web server.
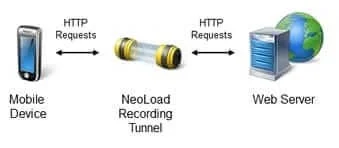
Important Tips:
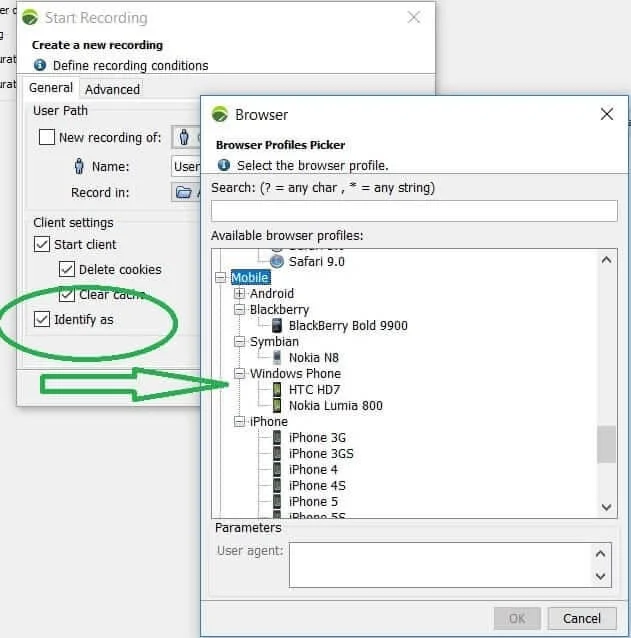
Another useful tool added into NeoLoad alleviates the need to even connect directly to a mobile device entirely. When starting a recording, click a check into the “Identify as” checkbox. On the right, a three-dot button […] becomes available.
A dialogue to select the desired device to emulate will open, choose iPhone/Android, and you can then use your browser instead of a mobile device to record your application the same as actually using a smartphone.
Aside from mobile recording to create your tests, sometimes you might want to emulate several iPhone/Android users accessing your application and performing the functions you’ve recorded. To do so is quite simple. When you set up your test, you must first create a population. It’s at the population level that you can select various options for these users to emulate (click on the Population tab in the design section of NeoLoad).
Click the plus sign at the bottom left under the population window, and it will ask you to name your new population. Once this is done, on the right-side window, you’ll see options such as User Path, Percent, Browser, WAN Emulation, and Handle Cache.
Click on the three-dot […] button to the right of “Browser,” and scroll to the bottom of the list. You’ll see multiple types of iPhone and Android options. Setting the smartphone emulation is as simple as that. To create users using various versions of phones, generate a different population for each and include them in your test.
It’s also important to note that there is a WAN emulation feature that lets you select and emulate mobile/wireless carriers and network speeds. Click on the three-dot button […] next to WAN emulation, and it opens the “WAN Emulation Profiles Picker.”

It’s the same as with the browser — you are supplied with a search to make finding a WAN type easier. The WAN types include broadband, LAN, mobile, and wireless service carrier types. You are also provided with latency and packet sliders to improve or decrease upload/download speeds even further. If you’ve selected a mobile or wireless service, you can drill down to the signal strength, from Good (3 bars), Average (2 bars), or Poor (1 bar).
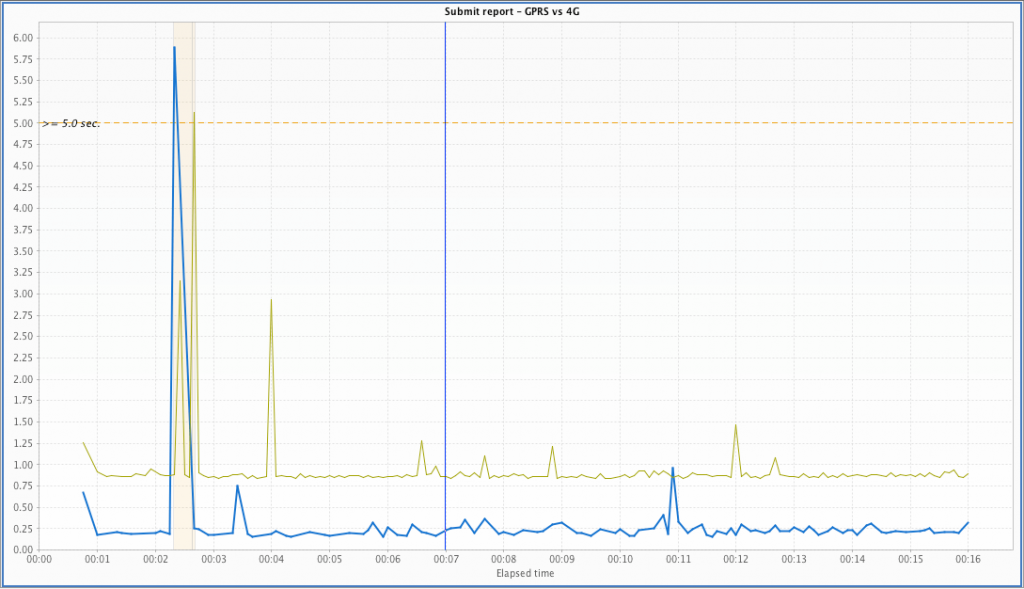
The power of bandwidth emulation is useful when comparing user experience, say, for example, a 3G set of users against a 4G set of users (see graph example comparison against your test environment above).
You can see that comparing the population of 3G users against those with 4G provides you with the distinct differences for each metric point which can help isolate specific desired conditions.
This blog was originally published in March 2018 and was refreshed in July 2021.
In this guide, we’ll break down the key points you need to know...
See Tosca’s latest cloud capabilities, from advanced test...
Implement 3 smart quality gates to achieve zero defects in...
Discover how you can keep pace with Salesforce innovation while...
Get an exclusive first look at NeoLoad 2025.1: New UI, extended...